What comes with the Lulzbot Mini?
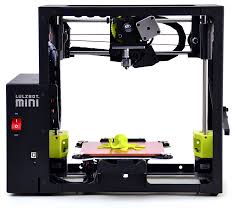
Lulzbot Mini 3D Printer (Packaged in box with protective foam)
HP Laptop (with Cura Software installed)
Tools (Spatula, Tweezers, Wire Brush)
Tools not included but useful ( Scissors, Super Glue and a Lighter)
Extra Extruder Cleaning Strips
Alcohol Wipes
PLA Filament (many varieties including: glow in the dark, red, blue, black, white and transparent.) (Ask TIS for available colors)
Power Cords and USB connection Cords
How to set up Lulzbot Mini?
Remove from Box and remove protective foam.
Plug in and turn on provided Laptop.
Connect laptop to Lulzbot using USB cord.
Plug in power supply for Lulzbot and turn on.
Place Lulzbot Mini on level surface.
What software do I use for Lulzbot Mini?
Cura Software is installed and an icon is located on the provided laptops desktop.
Where do I find files to print on the Lulzbot Mini?
You can obtain them anywhere as long as they are a .stl file. ( a favorite website is www.thingiverse.com)
How do I download .stl files?
Go to website (thingiverse for example), search for object you wish to print, click download all files, (the downloaded file will show in lower download bar in internet screen), select the down arrow and select show in folder, a window will pop up with your file selected, right click on file and select 7-Zip and then select "extract here", This file will have been extracted to the download folder and can be accessed in the Cura Software.
How do I use Cura Software and the Lulz Bot Mini?
Machine should be turned on and connected to Laptop
Open desired filament and raise filament arm and place ring around filament arm.
Snip the filament at an angle before inserting into extruder ( the angled cut helps feed the filament into the extruder)
There are 2 Screw clamps that need loosened to release and open up the extruder. Once this is done you can slide the filament into the hole and push until you feel resistance.
Close the clamps and tighten them back down.
Return to the Cura software.
The basic screen allows you to select 3 print qualities, 3 print materials (we use PLA) support structures and brim. Make desired selections.
Select load model and select downloads in menu. Your file will be located here. Then double click the file and it will appear on the virtual bed on the cura software.
If you click on the object you will be able to rotate, scale or mirror the object.
Scale is the most common adjustment... So size to your liking and an estimated time of completion will come up.
Once you are ready to print click on the control button.
Set the temperature to 220 degrees C.
Set the bed to 60 degrees C.
Once temperatures are ready you will be able to select print.
The Cura Software takes over from here.
Once object is done printing it will slide forward when bed is cooled.
Use spatula to pry under object carefully to pull off the bed.
Clean bed with Alcohol wipes.
How Do I change filament?
Select and file like you are going to print.
Set temperature to 220 degrees C.
Loosen the screw clamps and open up extruder and pull filament out after the temperature has reached 220.
Obtain new filament and snip filament at an angle and slide back into hole (you may hear sizzle) push lightly, then put screw clamps back into position.
You may need to click extrude button on control screen until old filament is expelled from extruder.
How do I maintain a safe environment for my students?
Sign and Follow the attached Safety Protocols and Guidelines located in the Tab Menu above.
